MCP for Unity v5 Migration Guide
This guide will help you migrate from the legacy UnityMcpBridge installation to the new MCPForUnity package structure in version 5.
Overview
Version 5 introduces a new package structure. The package is now installed from the MCPForUnity folder instead of the legacy UnityMcpBridge folder.
Migration Steps
Step 1: Uninstall the Current Package
- Open the Unity Package Manager (Window > Package Manager)
- Select Packages: In Project from the dropdown
- Find MCP for Unity in the list
- Click the Remove button to uninstall the legacy package
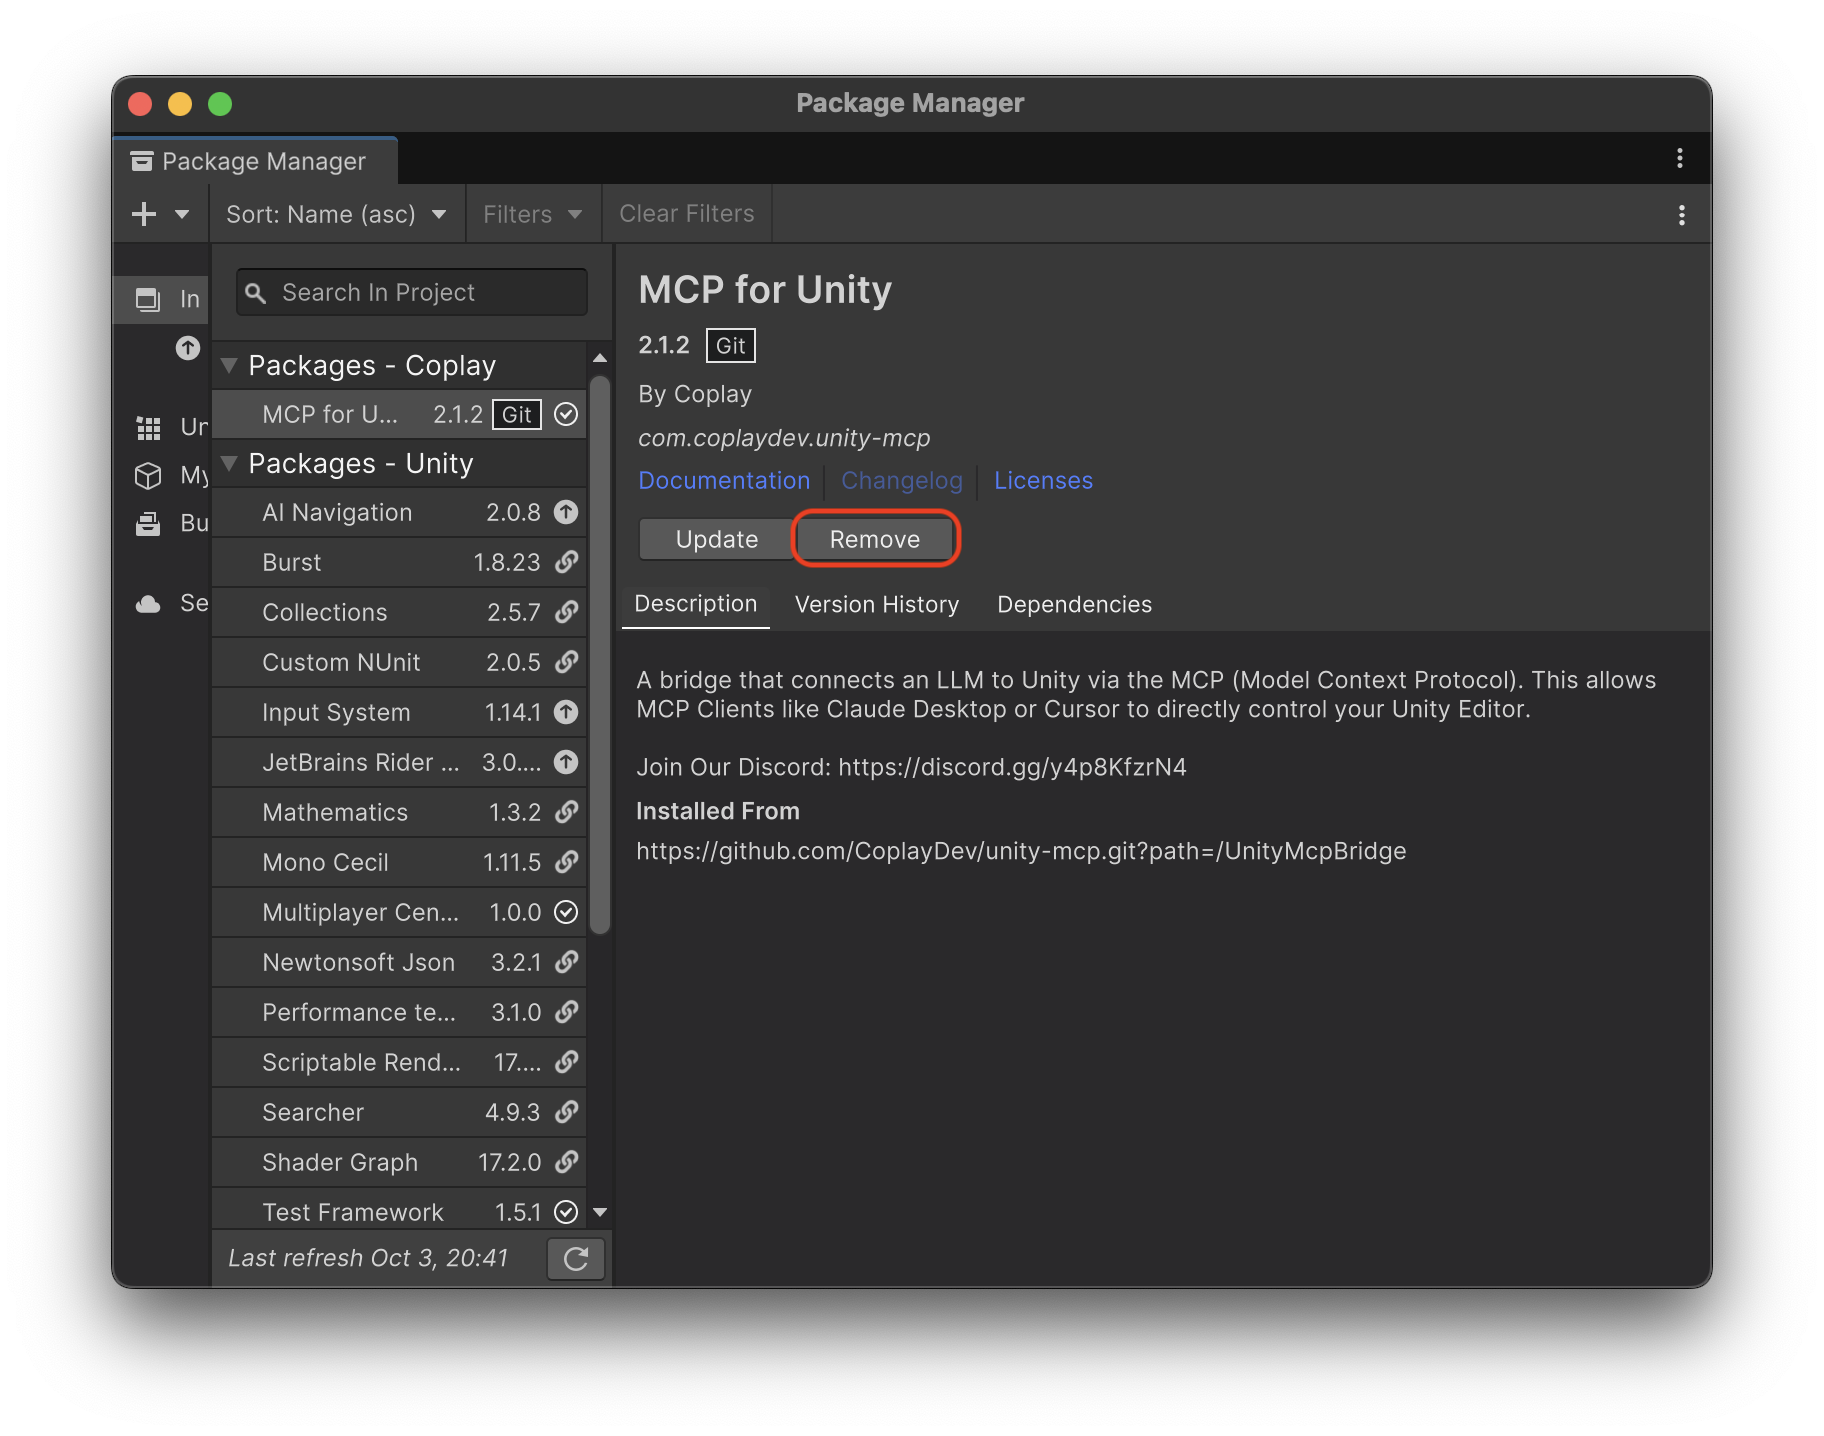
Step 2: Install from the New Path
- In the Package Manager, click the + button in the top-left corner
- Select Add package from git URL...
- Enter the following URL:
https://github.com/CoplayDev/unity-mcp.git?path=/MCPForUnity - Click Add to install the package
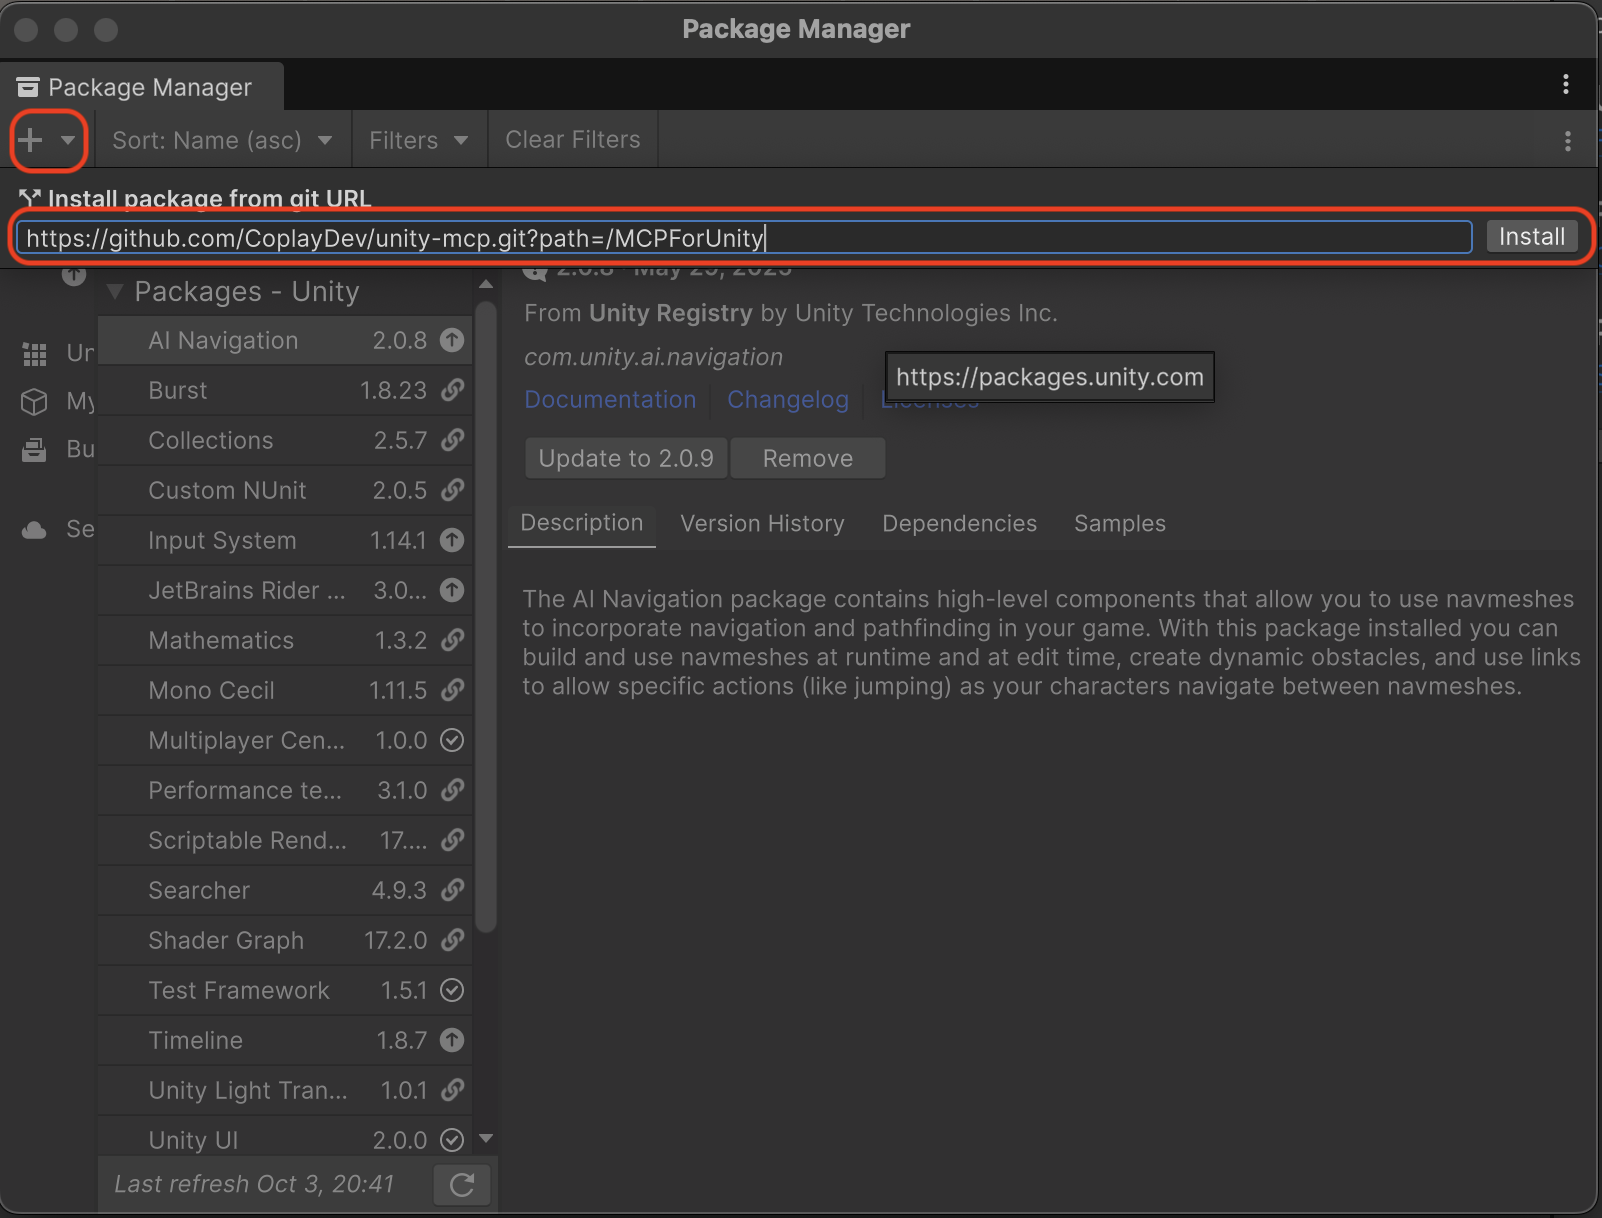
Step 3: Rebuild MCP Server
After installing the new package, you need to rebuild the MCP server:
- In Unity, go to Window > MCP for Unity > Open MCP Window
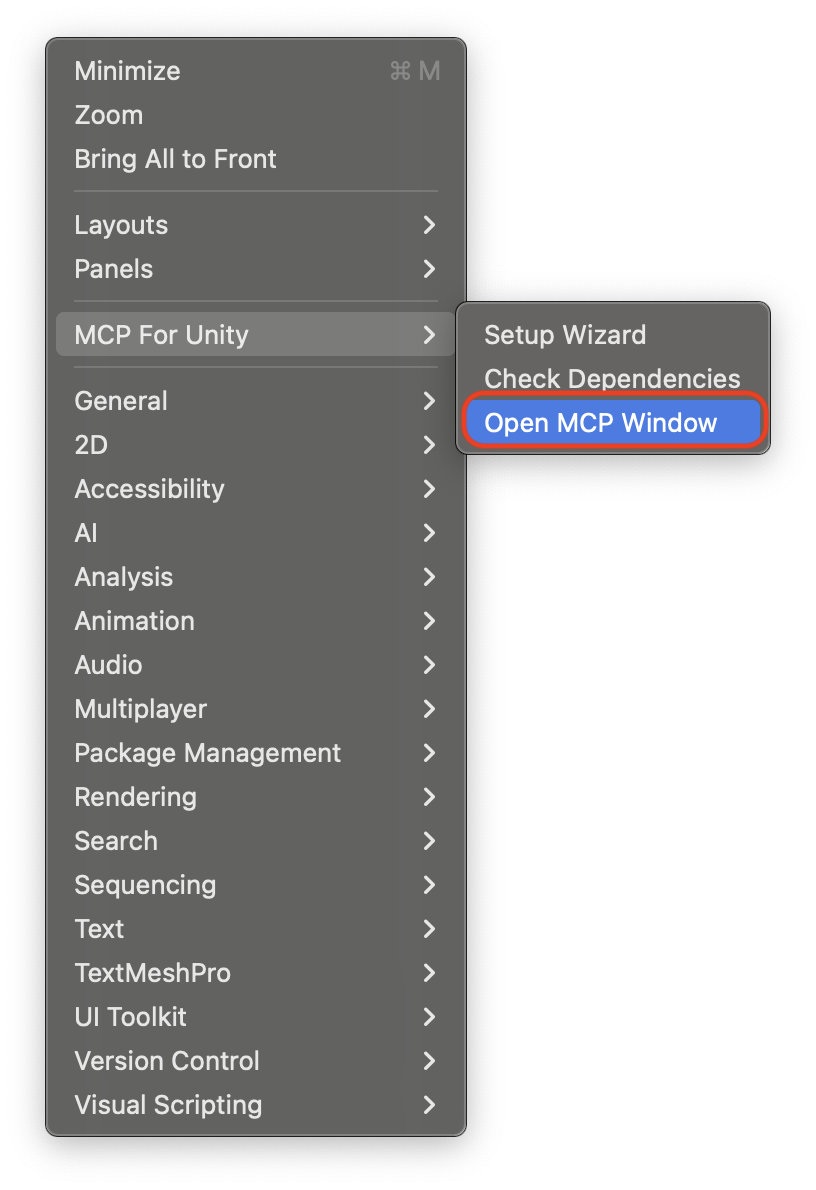
- Click the Rebuild MCP Server button
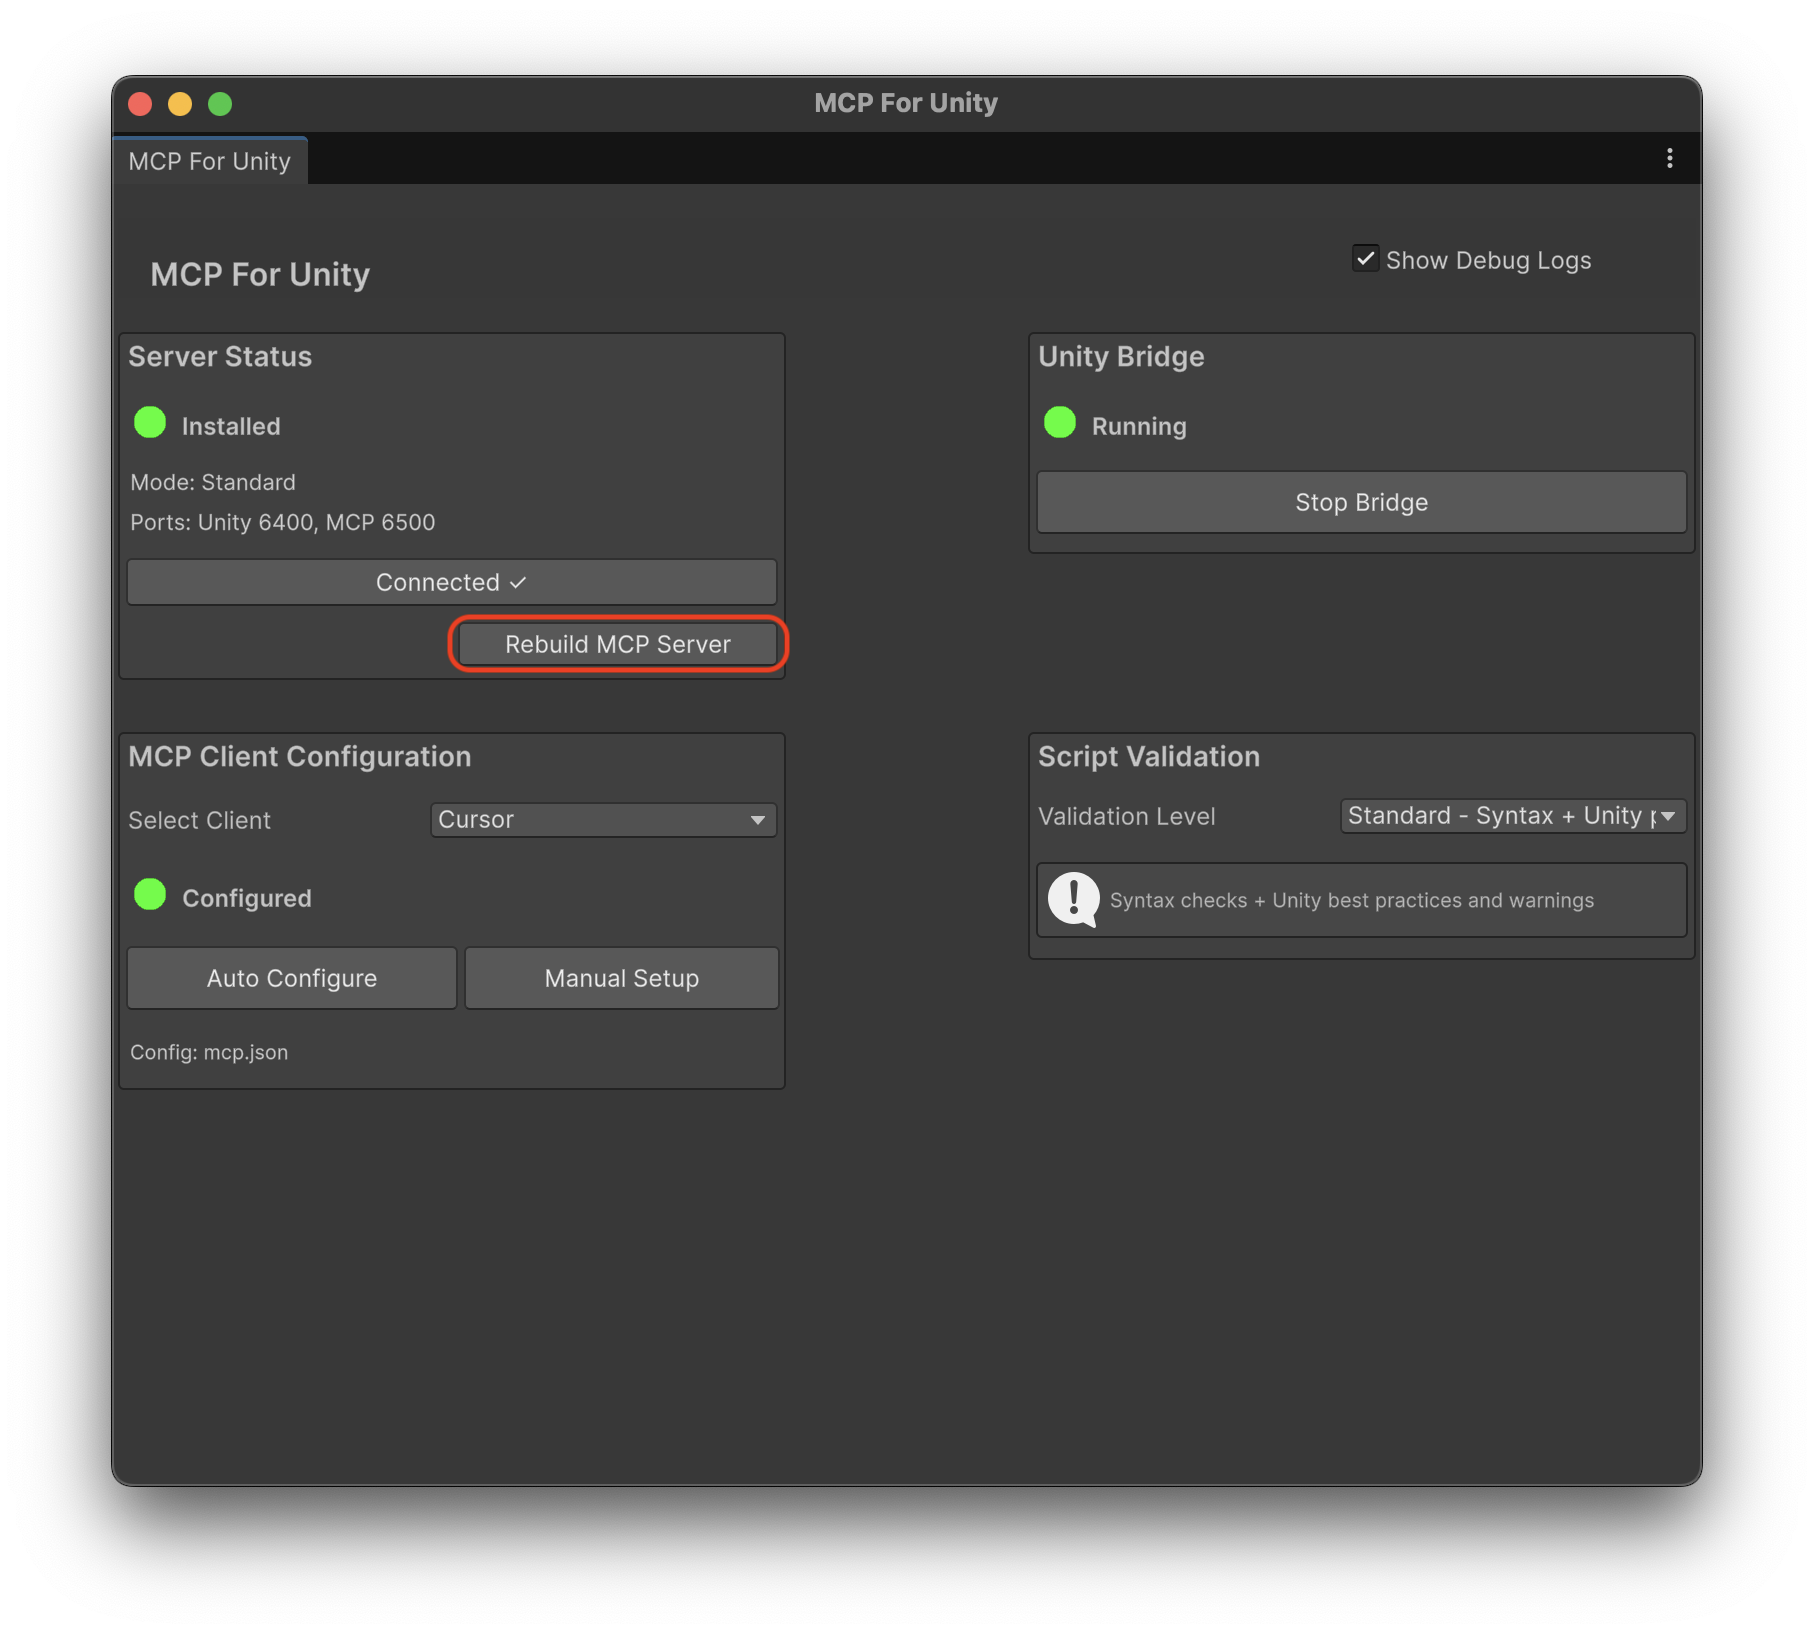
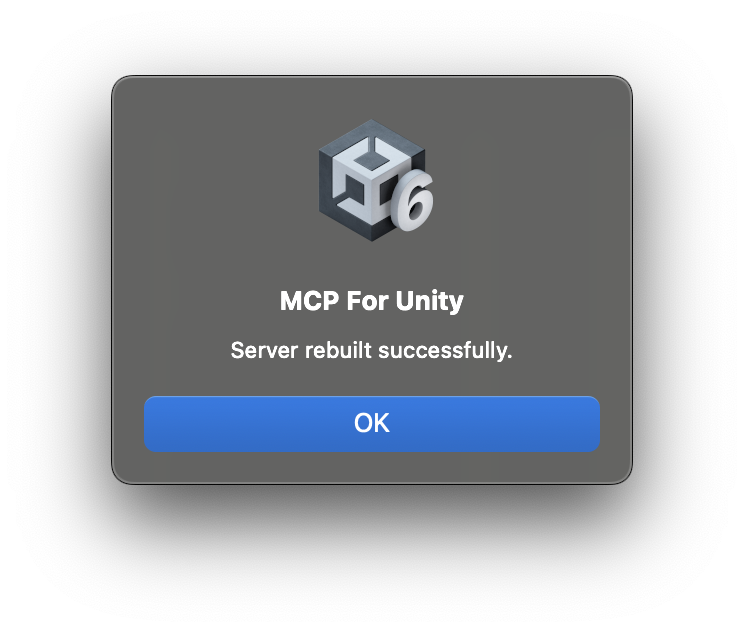
- You should see a success message confirming the rebuild
Verification
After completing these steps, verify the migration was successful:
- Check that the package appears in the Package Manager as MCP for Unity
- Confirm the package location shows the new
MCPForUnitypath - Test basic MCP functionality to ensure everything works correctly
Troubleshooting
- Check the Unity Console for specific error messages
- Ensure Python dependencies are properly installed
- Try pressing the rebuild button again
- Try restarting Unity and repeating the installation steps